
This page was last updated on $Date$.
Got the Heritage carpet kit for my friends '54 100-4. About to begin. Any words of advice before I begin? The kit has the carpet but also has the tan jute padding. What holds the carpet bits that are not clipped in (like the floor) to the car. Glue? And if so, how does that work? Do I glue the jute to the car, then glue the carpet to the jute? Clue me please.
No, I haven't got the Armacord as a kit, just a big sheet of Armacord on a roll. The Armacord bits seem pretty straight forward, but, we'll see how it goes. Should I do the Armacord before the carpet? The Heritage carpet kit bits seem pretty good, but I still need to test fit a few. The padding kit seems all wrong. None of it seems to fit well at all. I think it's a BN2 kit, from the cutouts on the gearbox cover bit. So right now, I'm starting with a bare interior, no Armacord, carpet, carpet snaps on the floor, a fresh canvas!
Paul Barnes
Bensalem, PA
Before starting, I must state that I have no financial or business connection with Heritage Upholstery and Trim, I'm just a satisfied customer.
I recommend that you purchase the Heritage "Trunk Liner Armacord Set" (at approx. $330.00 U.S.) and the "Rear Deck Bulkhead Armacord Set" (at approx. $295.00 U.S.) Remember it should be in the appropriate colour to your interior. Ask for these kits to be "hand bound" (Heritage's terminology) and this will get you the correctly bound wrap over and stitch binding, not the incorrect binding usually supplied by most of the usual sources.
I would venture to say (with all due respect) that if you have the Armacord in just straight yardage, you probably will not be able to cut and bind it correctly. The cutting and fitting will be anything but "straight forward". Some of you may be trying to save a bit here, but the most recent sets I got in from Heritage done in dark blue, were the above mentioned prices and well worth every penny. Of course these prices are subject to change, but at least it will give you some idea.
I would strongly suggest the Armacord sets be present before you begin all the installation. Also make sure the surfaces are clean and smooth with no welding lumps or mismatched surfaces present to eventually chafe through the trim.
I usually begin by trimming the trunk area. Study the Armacord pieces and you will see some that have unbound edges, and some that have bound edges. The bits with the unbound edges will be installed first. The best quality contact cement will be used, the expensive smelly stuff works best. I personally use LePages Premium Contact Cement applied with a 2" wide brush. A water base glue may let go in time with dampness so is not recommended.
Follow the instructions on the container and give yourself plenty of fresh air, working at a normal room temperature.
I usually begin by fitting the trunk wheel arch pieces. Test fit dry and become familiar with how the pieces fit before applying glue to both surfaces. When the glue is surface dry, carefully install, working everything in smoothly. I use my thumb in an old teaspoon to tuck and smooth edges and contours, etc.
Next, the flat inner wheel arch covers can go in, making sure the bound edges fit uniformly up to the curved wheel arch panel, and the perimeter fits evenly all around. There is no need for a heavy glue application along the rear edges where the material covers the fender bolts. This allows any future access to these bolts if needed. Make sure the rest of the panel is well glued and applied smoothly to eliminate unwanted wrinkles, etc.
Proceed with the rest of the trunk lining panels, always applying the bound edge bits last.
Care should be taken when installing the spare tire shelf piece, which also incorporates the tire sleeve that will protrude into the interior. The sleeve portion has vinyl flaps that will be glued into the interior perimeter of the opening. Also the triangular vinyl trimmed wood tire stop block will fasten in place on the right side wall, screws coming into the wood from the outer wheel arch. This block will trap the wheel arch Armacord and vinyl bag seam and supply further reinforcement for the heavy handed owner who forces the spare tire into the opening.
The forward vertical wall section in the tool / battery switch compartment can also go in early on. It's totally unbound and can go in after a test fit.
The vertical separation panel can be trimmed next, ensuring the top and bottom edges and the wrap around vinyl binding along the rear edge follow straight and true.
The tool compartment floor piece needs a single cut in from the front edge to the battery switch hole. Make the round hole as required for a close precise fit to the switch knob. This Armacord piece will remain loose, but a snug fit.
The rear most boot panel that curves up from gas tank to boot latch will be only partially glued in place, just enough to keep it from moving out of position. This is to allow access to the license lamp wiring.
The left and right boot floor well areas will be partially glued as required to keep from moving, but loose enough to allow access to wiring harness and plugs.
The main boot floor gas tank cover will be totally loose, with no glue applied at all.
At this point the boot should be all trimmed and the vinyl tire sleeve should be protruding through into the interior.

Note that the only difference between the BN1 and the BN2 is the the somewhat simplified triming of the gearbox cover and tunnel area for the BN2.
The first thing to install in the car is the heavy felt paper (tar paper) lamination onto the bare steel floor. Hundreds built before the unification of chassis and engine numbers in late summer '54 will originally have had the tar paper installed under the main seat runners. Cars after that point had the tar paper installed over the entire flat floor areas extending up to the toe boards. Your choice here.
I usually install the inner sill carpet pieces next, glued in using a premium contact cement as per part 1 of this effort.
The fixed tunnel carpet can be installed.
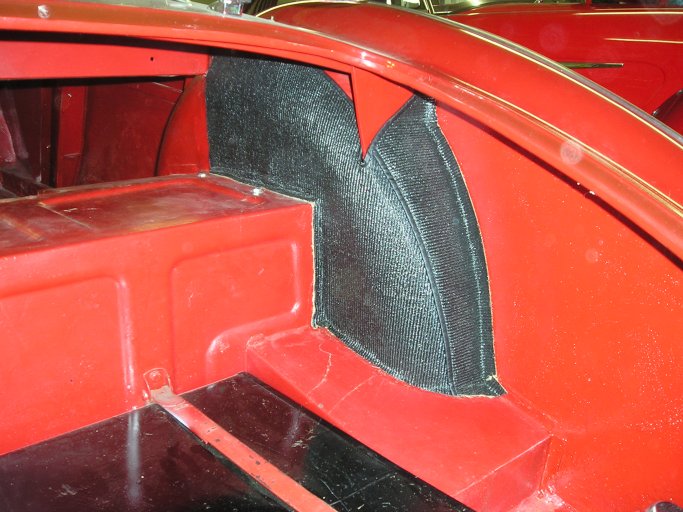
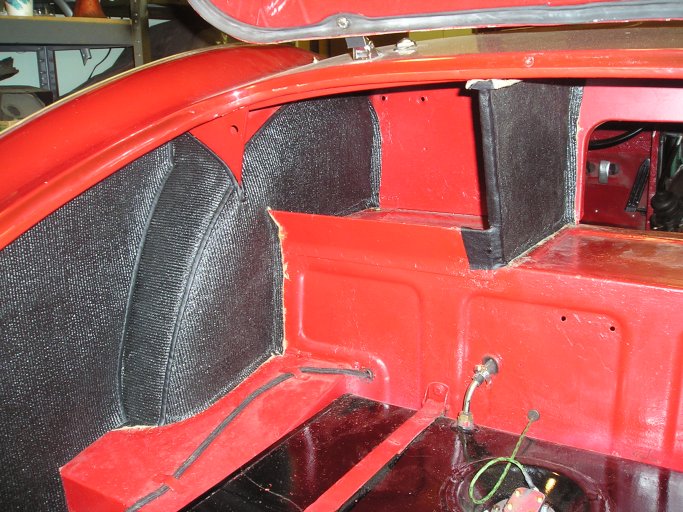
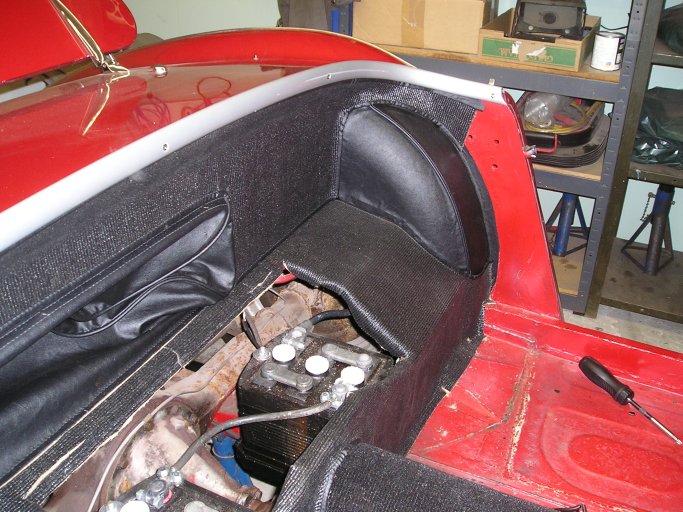
The vinyl wheel arch covers need to be installed. First a thin brown jute pad is installed of the same shape to cover the flat portion of the wheel arch. This will provide the necesary padding so the top bows won't be wearing the vinyl covers against hard metal, causing quick wear holes in the vinyl.
I usually glue in the inboard portion of the vinyl covers up to the stitching line first, keeping the seam line vertical when viewed from the front and the inseam turned outboard as seen in the photo. When that is fitted and glued, the outboard portion of the cover is then glued and fitted.
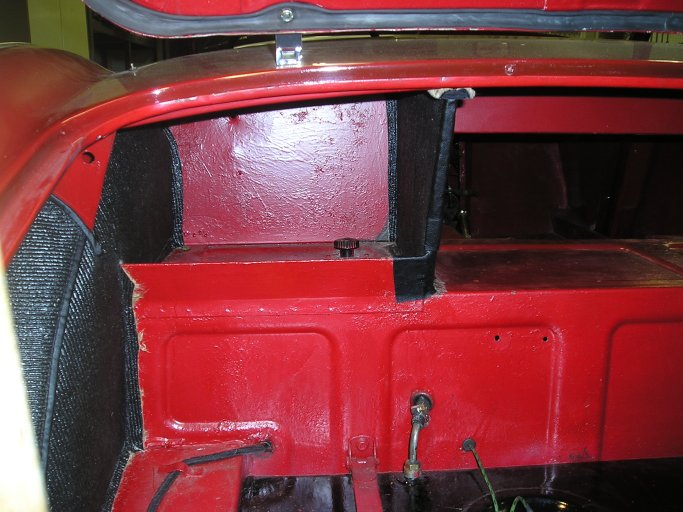
The Armacord rear shelf piece is then fitted, making sure all the perimeter edges of the battery aperture are glued so the armacord can wrap neatly over the lip and glue onto the under side. Also make sure the edges are all fitted evenly up to the wheel arch trims you just installed. This piece will continue to be glued down the vertical heel board to the floor, and must have a neat fit to the fixed tunnel panel.
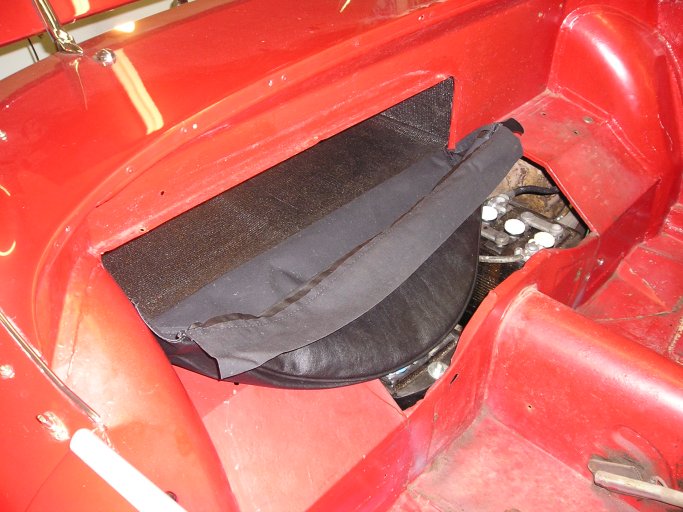
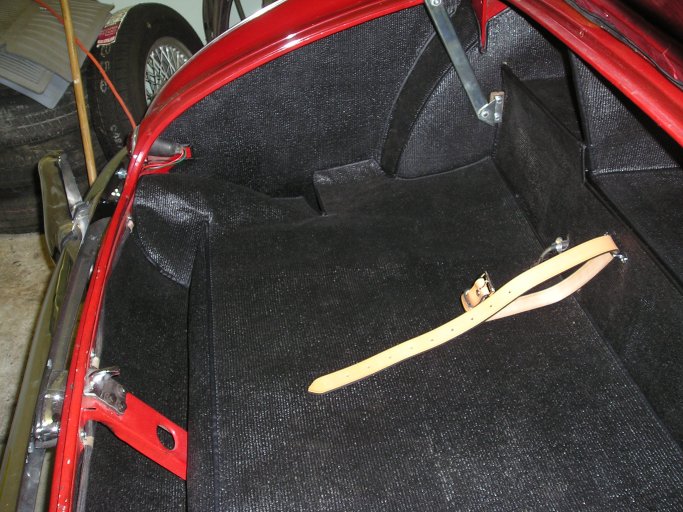
The spare tire envelope must be carefully glued around the perimeter lip of the tire aperture. Along the top flange of this aperture 3 small holes will be observed. Once the vinyl is glued along here, three dull black male/female drive rivets will be fitted and squeezed together to help reinforce and lock the vinyl lip to the inner steel lip. Looking carefully the centre and right one can be seen in the above picture between the rows of reinforcing stitching.
The vertical rear panel Armacord can now be fitted and glued into place. The top edge of this piece will have a strip of vinyl which is to be glued evenly along the rear tonneau panel where the rear shroud rivets are located. Then this vinyl edge will be mostly covered by the rear alloy cockpit rail when installed.
Now we can move to the carpet installation.
First the foot box jute insulation panels should be glued into place. Originally the jute used was quite thin, about 1/4" thick with a black finish on the outer side. Most of the suppliers, including Heritage are supplying a jute under lay that is about 1/2" thick. It is much too thick to be used exactly as per original in some places, the extra thickness causing difficulty in achieving the best fit and finish. I'm sure the extra thickness will insulate better, so it can be a bit of a trade off. I have had fairly good success in carefully delaminating the jute supplied to get the thickness I want.
Anyway, the toeboard and inner foot box panel will have jute glued to it. Then the toeboard/inner foot box carpet (1 piece per side) will be glued to the jute. At the forward edge, the carpet must be wrapped around the front flange and glued. Make sure carpet and under felts don't interefere in any way with the pedal shafts and contols.
Continuing along with this BN1 carpet installation, I should point out that through experience I've learned it's much better to send Heritage the following parts and have them trim them: gearbox cover, lift out extension piece, parcel tray and battery compartment lid.
The battery lid will need to have the two loose supplied leather straps installed on the front edge, again each fastening in place with two of the male/female sleeved rivets, same as are holding the spare tire envelope to the metal aperture edge. These straps will need to be fitted once the lift-a-dot studs (supplied) are installed into the heel board panel. A slight stretch to snap the lid straps will be about right.
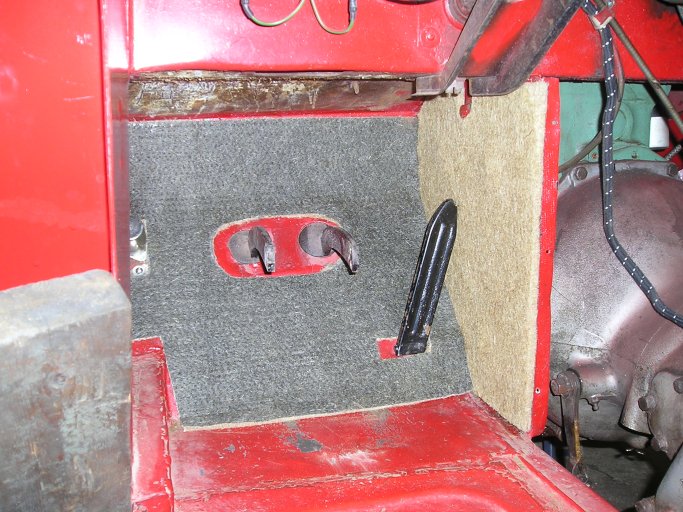
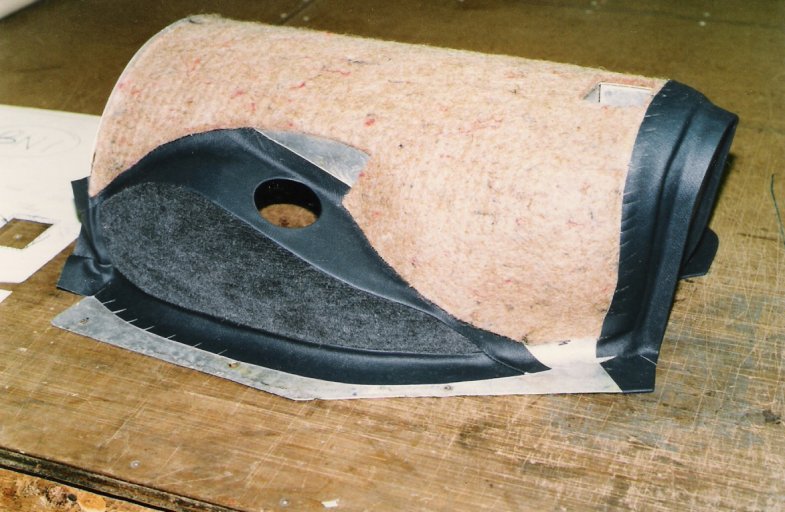
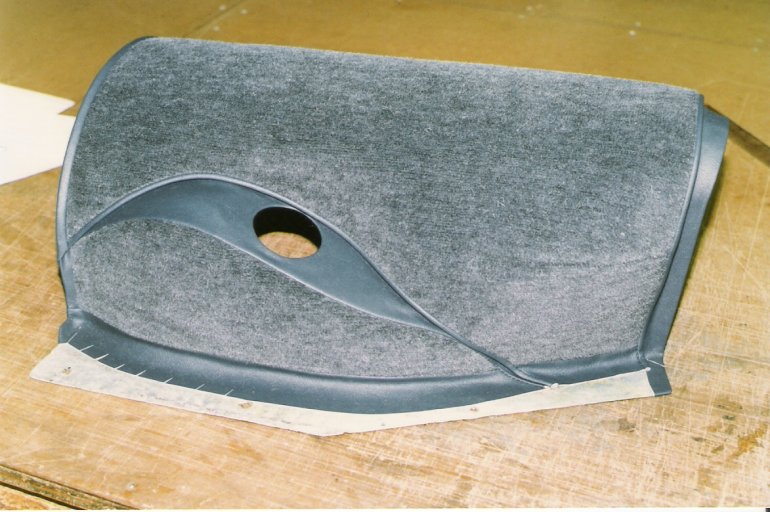
The gearbox cover is a complex assembly of nine pieces of vinyl and carpet, with thin jute underlay glued to the metal cover, then the carpet and vinyl onto the jute. It just makes for a much better job to have Heritage do this part.
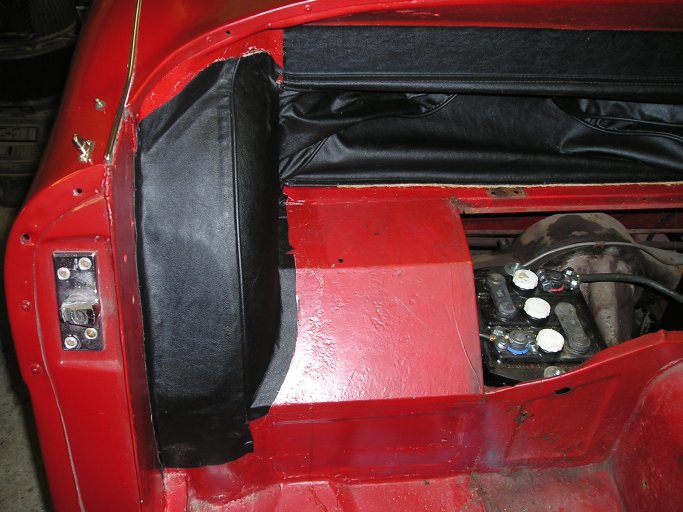
The vertical bulkhead panel will have a rubber U shaped diaphragm fastened to it on the engine side with split rivets and washers, then the carpet is glued to the interior side. This carpet will wrap around and glue to the back side of the left and right sides, and come up over the upper stepped flange and be glued to the back edge. This panel will screw into the car with a tight carpet to carpet seal on the sides, and a rectangular rubber sealing strip will glue to the steel bulkhead with a slot to allow the tach and speedo cables and the overdrive harness to come through.
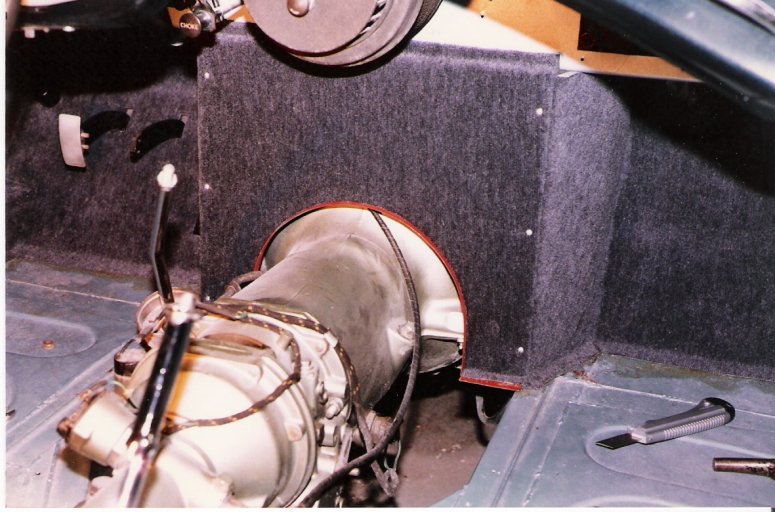
Once the bulkhead panel, the gearbox cover and the tunnel extension pieces are all installed, the floor coverings can be fitted.
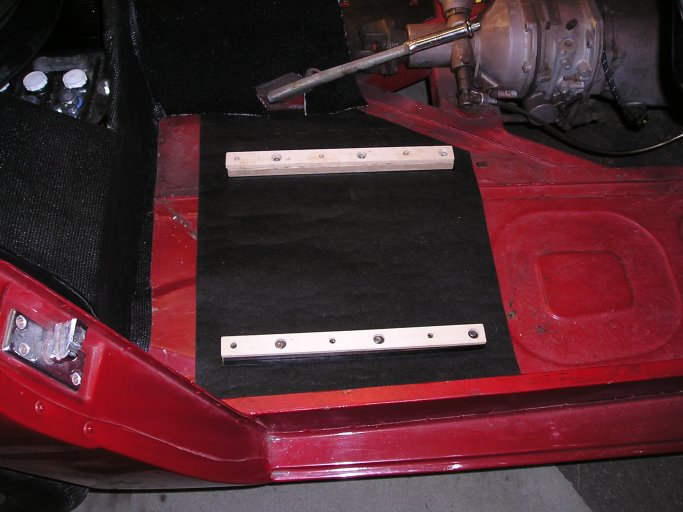
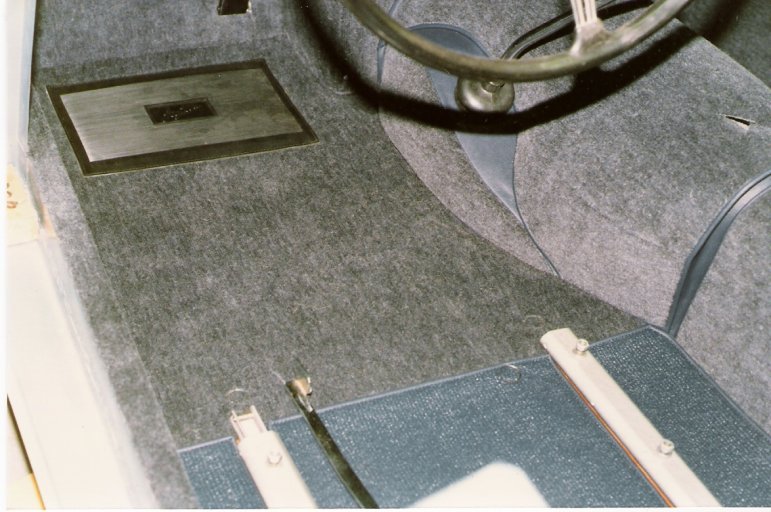
The flat floor surfaces originally were laminated with thin (1/4") burlap looking jute under lay, black surface up. Each male snap for the floor Armacord and the floor carpets will be anchored to the floor with a small (#6) self tapping countersunk flat head screw going down through the thinned down jute.
The Armacord floor pieces that fit under the seats will be held in place with a single ring snap through the Armacord just outboard of the inner seat runner and just back from the front edge.
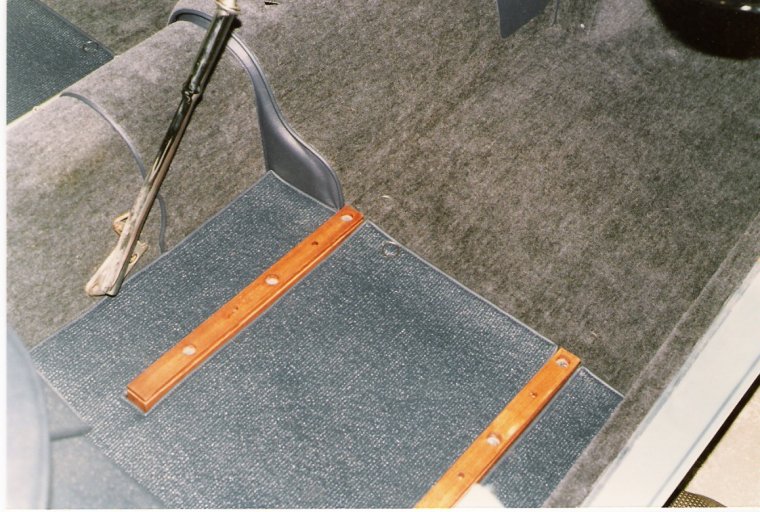
The flat floor carpets will butt up to the Armacord floor pieces just at the front edge of the seat runners. These carpets will be fastened in place with four ring snaps as per in the pictures. The two forward ones on the driver's side are already installed under the Austin heel pad.
I should perhaps describe the installation of the ring carpet snaps that install into the Armacord and into the floor carpets.
First, with the male snap stud already fitted to the floor, trial fit the carpet piece. You will be able to feel the location of the male stud through the thickness of carpet. I use a small piece of chalk to make a mark on the carpet exactly where the stud is located. The I take the carpet piece over to the bench where I pierce the ring portion with the three pointed tabs into the carpet until the tabs can be seen coming through the back side of the carpet. Then I place the ring in the carpet onto a small hardwood block placed on the work surface. Install the three eared female portion of the snap onto the tangs and carefully press the tangs outward until flat, locking the snap assembly in place.
Test fit the carpet piece into the car, making sure the location of the carpet has not shifted in any way, and there is no strain on the carpet to get the snaps done up. If you need to adjust the location of a snap, the tangs can be easily straightened and the snap relocated as needed.
There is your carpet and Armacord installation for a BN1. Did I forget anything?
Please send comments, additions, and errors for the SOL Healey web pages to Bob Haskell.
[SOL
![]() Web
][
Scions of Lucas
Web
][
Scions of Lucas
![]() Home Page
][
SOL British Car Clubs Page
]
Home Page
][
SOL British Car Clubs Page
]